It’s been a few weeks, and I’ve made some great progress in my craft room. It’s not done, but it’s getting there!
The first day I wasn’t sure where to start. I work full time outside the home, so I only had about an hour each day. I wanted to do a general inventory of what I had, but when I looked at all the shelves of ‘stuff’ the task just seemed overwhelming! So I decided I’d take one easy (or so I thought) step. I would move all the books into just one cabinet. First step was to empty that cabinet… and where was all that stuff supposed to go??
STEP 1 - I put out 4 boxes I’d labeled with my major craft categories, In my case
“Art supplies”
“Sewing supplies”
“Scrapbook & paper crafts”
“Jewelry & Beads”
I began pulling things from the shelf and sorted them into one of the 4 boxes. I soon found that I needed two other boxes:
“Put away”, things that did not belong in my craft room, and
“Give Away”, things that I would pass on to friends, or donate.
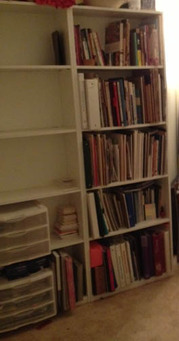 | I sorted quickly, and I soon had an empty shelf, but my hour was up. The next day I was able to move all the books scattered in my room onto the empty bookcase. I did find a lot more books for the “give away” box, and a few that were not crafting books at all, they went to another room. I even got my “put away” box emptied before my hour was up. Here are photos of that first step Somehow in the process I seemed to have made a bigger mess! I needed help… stat! My sister (the super organized one) suggested we do a Barn Raising party - like in days of old when ranchers would have a picnic, and all the neighbors would help raise the barn. I liked the sound of that. The following week I had a day off from work, so I put a call out for help and we had a Craft-Room Raising party. |
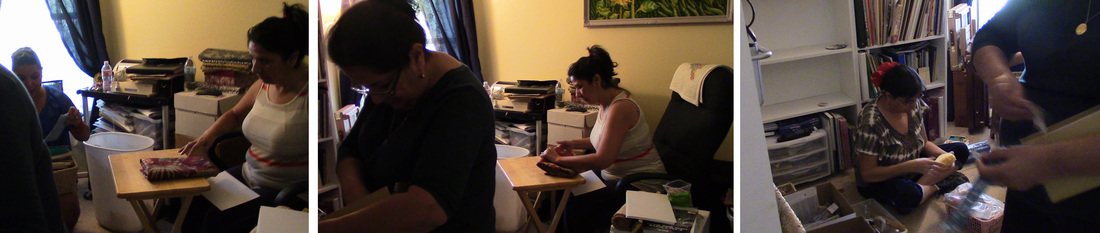
On the designated day one of my daughters came by for the morning, and three of my sisters came and spent the day. We sorted, and talked, and laughed, stopped for lunch, then went back to work. In the end the room was not only sorted but well on its way to being organized and beautiful, and in the process we had a really fun day.
It was easier to stay on task with others there, easier to fill up the 'give away' box, and it was way more like play than work!
It was easier to stay on task with others there, easier to fill up the 'give away' box, and it was way more like play than work!
Step 2 – next was deciding where everything would go. I spent a few days before the Craft room raising in my room deciding where everything would go. This is actually an important step – otherwise I think things would be put on random shelves “just for now” and never get truly organized.
Step 3 – add any organizing tools/shelves/ bins, etc.
• I knew I had a lot of small things that are hard to store – unless you throw them in a box, so before the craft raising I made a behind the door organizer. Mine is like a shoe holder, but with a couple of rows of extra large pockets, and a rack for spools of ribbon.
• I gathered boxes and baskets, and my sisters brought me bins and storage containers that I added to my arsenal –I wasn’t sure what I was gong to use, and knew I could always give away what was left over.
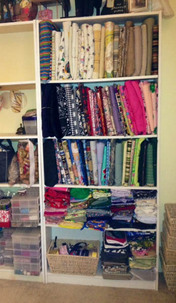
• I also decided I didn’t want to stack my fabric back in my closet, or in bins; it’s too easy to lose sight of what you have. I wanted my own mini fabric store, where I could see everything. I decided to stand my fabric up on shelves. I came across Comic book backing boards, the perfect size and weight to wrap fabric (priced at about $10 for 100 boards). I was amazed at how little space the fabric took when folded onto boards. Even pieces over 5 yards only took up a couple inches.
This photo is 100 pieces of fabric –1 to 5 yards each. At the bottom are my small, less than ½ yard pieces
Step 4 – Putting things away – now that everything was sorted into boxes, and I knew where they were going to go, it was just a matte6r of putting things away.
Now, that sounds easy, but the truth is each box took me a day or two (remember my one hour increments) to actually get on the shelves, but I just did it a bit at a time.
All it all it took me about three weeks to get to this point. I have more I want to do. I want to bring in a sewing table… and have a better place for all my threads and sewing supplies, but I think it’s looking good!
If you are on a quest to organize your craft room/space here are a few tips, and traps:
- Plan ahead and have your sorting boxes ready. Have an idea in your mind (or on paper) of where you plan to put everything.
- Take it a small bite at a time, don’t try to get it all done in a day
- Bring in a friend or two… or more and have fun with it
- Remember that you will actually make more of a mess as you or organizing. Don’t get discouraged, it will be so much better soon
- Think outside the box – I’ve always stored my fabric in bins – I love them on the shelf
Here is a quick video of my room so far… almost there!
Step 3 – add any organizing tools/shelves/ bins, etc.
• I knew I had a lot of small things that are hard to store – unless you throw them in a box, so before the craft raising I made a behind the door organizer. Mine is like a shoe holder, but with a couple of rows of extra large pockets, and a rack for spools of ribbon.
• I gathered boxes and baskets, and my sisters brought me bins and storage containers that I added to my arsenal –I wasn’t sure what I was gong to use, and knew I could always give away what was left over.
• I also decided I didn’t want to stack my fabric back in my closet, or in bins; it’s too easy to lose sight of what you have. I wanted my own mini fabric store, where I could see everything. I decided to stand my fabric up on shelves. I came across Comic book backing boards, the perfect size and weight to wrap fabric (priced at about $10 for 100 boards). I was amazed at how little space the fabric took when folded onto boards. Even pieces over 5 yards only took up a couple inches.
This photo is 100 pieces of fabric –1 to 5 yards each. At the bottom are my small, less than ½ yard pieces
Step 4 – Putting things away – now that everything was sorted into boxes, and I knew where they were going to go, it was just a matte6r of putting things away.
Now, that sounds easy, but the truth is each box took me a day or two (remember my one hour increments) to actually get on the shelves, but I just did it a bit at a time.
All it all it took me about three weeks to get to this point. I have more I want to do. I want to bring in a sewing table… and have a better place for all my threads and sewing supplies, but I think it’s looking good!
If you are on a quest to organize your craft room/space here are a few tips, and traps:
- Plan ahead and have your sorting boxes ready. Have an idea in your mind (or on paper) of where you plan to put everything.
- Take it a small bite at a time, don’t try to get it all done in a day
- Bring in a friend or two… or more and have fun with it
- Remember that you will actually make more of a mess as you or organizing. Don’t get discouraged, it will be so much better soon
- Think outside the box – I’ve always stored my fabric in bins – I love them on the shelf
Here is a quick video of my room so far… almost there!

 RSS Feed
